I know, I know, it sounds like a weird idea–what in the heck is a grounding sheet? Well, I came across the concept while reading a book which mentioned disrupted circadian rhythms usually led to weight gain, feeling sluggish in the morning, snack cravings at night (hence weight gain), etc, and I thought–“Whoops! That sounds like me!” So I started looking into ways to get back into balance. I haven’t managed to get up early and stay in the sun for a half hour between 7 and 9 am yet (precious little sun here lately, anyway–raining now, s’matteroffact), but I thought, “Sleep must be a real culprit–I wake every morning almost more tired than I went to bed!” So delving a little deeper, I found out about grounding sheets.
The idea of a grounding sheet is to connect us electrically (we’re pretty electrical, believe it or not–every thought is a small electrical pulse–in fact, all neurons are firing off electrical impulses all the time to communicate) to the earth, to “ground” us. There’s a lot of EM interference from all the appliances in our houses, clocks, computers, lights, etc., so it’s a good idea to ground out that energy at night for deeper rest. There’s something to do with the Schumann resonance, too, which is some deep vibration in the earth that is healing and soothing–but to be honest, I just read a little bit and thought, “Cool! I’ll try it! How much are grounding sheets?” Well, we have a queens-sized bed, sooooo, I was dismayed to find that they cost $199–more than I cared to spend on what was an experiment, anyway. So I found a video by a guy who made his own. What follows, then, was me following his instructions, with a little help from my husband Sherman, who got to use his electronics degree 😉 My total cost for the materials below (I already had the tape and the scissors) was under $15.
It’s important to note that this is merely a mattress cover–you will not be sleeping skin against metal! Instead, your regular sheets will cover the grounding sheet.
Materials you will need:
- An old sheet you don’t mind sacrificing to the cause
- Metal screen wire mesh (as for a screen door) that is not coated or fiberglass (which is not conductive)–enough to cover where your torso will go (I chose the smallest roll I could get)
- Scissors (wire stripping tool is handy, too, but I used scissors for my part)
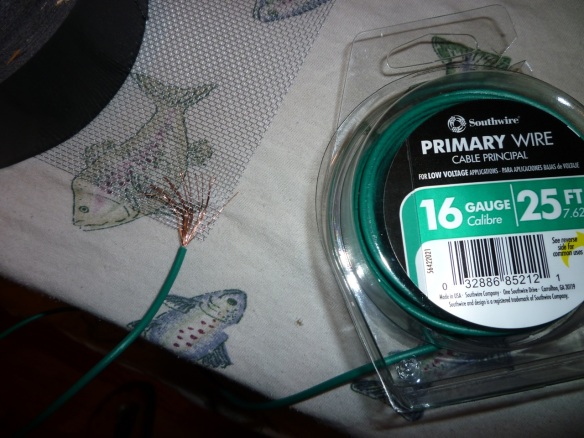
- Single grounding wire (I chose green for ground, and 16 gauge, because it was long enough in the pack to do what I needed)–you will need to measure the “path” to know how much wire to get
- Strong duct tape (I used Gorilla tape)
- Something metal & conductive to be a “stake” for the ground outside (I did not get into the grounding through an outlet, as I believe this outlet may not be grounded, nearby, so instead, if you wish to go that route, watch the video, and he explains it 😉
- If you plan to solder wire instead of simply wrapping it, you will need a soldering iron and solder and wet sponge and patience.
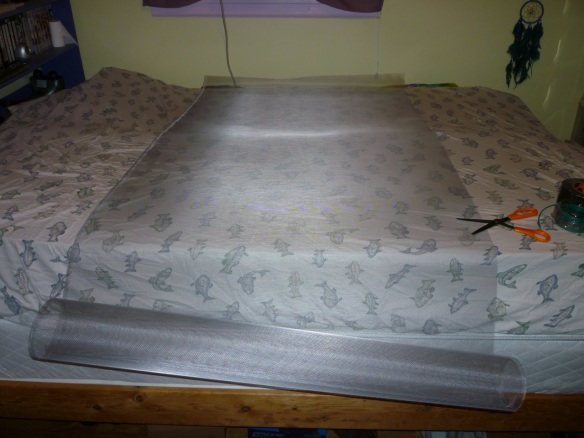
First, unwrap the screen and lay it out on top of the sheet roughly where your torso will lie at night. Cut off the excess (this was surprisingly easy to do with scissors, I thought) so that it is a bit in from the edge (ie. 2 inches or so) on either side.
Carefully strip off an inch of the wire insulation from one end–I did this with scissors, too, cutting around and sliding it off, but if you have a wire-stripping tool, definitely use that–easier and faster! Thred the copper ends as best you can over & under & into the mesh at the corner closest to where you intend to run the wire out a window (or to an electrical socket).
Next, thoroughly tape the mesh to the bed. I doubled in some places, because it would get uneven on the cut edges, and I did NOT want to wake up being poked by metal. Be sure to tape it well–the weight of your body will cause it to sag inward at some point, and that is important to consider, too. I tried to get the mesh edge right in the center of the tap, but that was not always feasible. No one will see it, so don’t worry about how it looks, as it all gets covered by a regular sheet in the end.
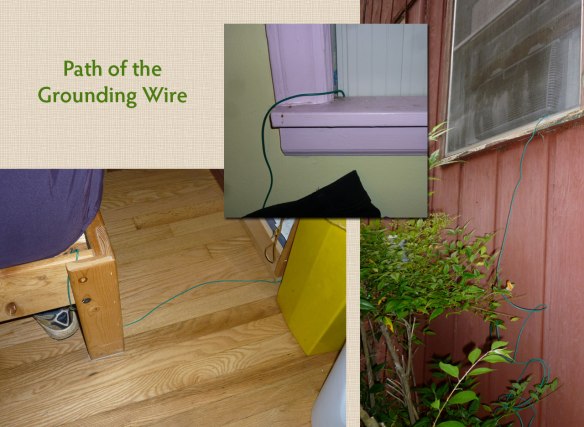
After the mesh is taped and the wire connection is also well-taped, run the wire down the bed, across the floor, up the wall, whatever, out the window (this is why a smaller gauge wire works well–it goes easily under a screen in a window, or in this case, a window fan, to dangle outside until you connect it to your grounding stake.
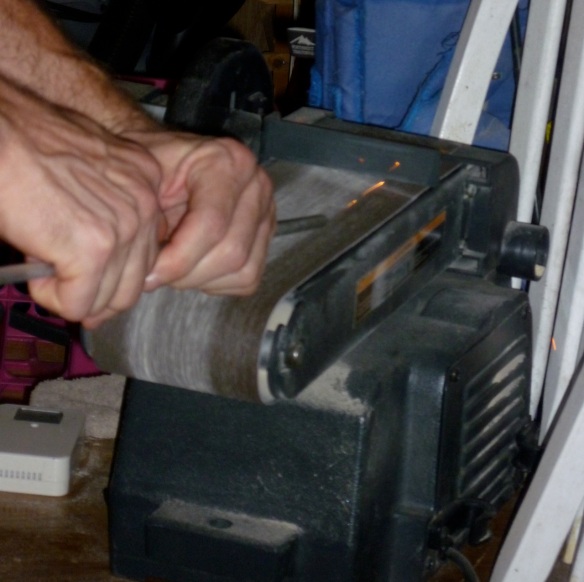
The guy in the video suggested just using a clothes hanger, cutting it into a straight wire, sanding off the edges, and wrapping the wires around one sanded end with electrical tape while plunging the business end into the ground. But my husband, having an electronics degree, and a friend visiting who is an electrical engineer (whom I was amazed did not laugh at this idea, but thought it was very logical and added his input) insisted that a true ground to get to the Schumann resonance needed to be longer than a 6 inch tent stake (that I was planning to use), so Sherman dug in his leftovers and found a 24″ aluminum bar, .25″ thick, and decided it would go in easier if he sanded the edge to a point (I did not mention a belt sander in the requirements–I think it would still go in easily enough, with all the rain we’ve had!)
So the finished grounding stake turned out way more heavy-duty than I intended 😉
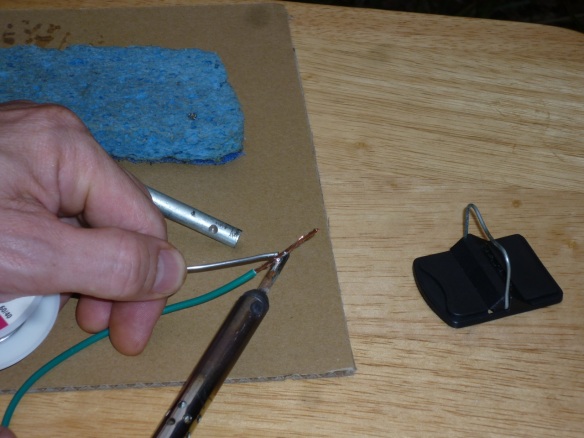
Next comes attaching the wire to the stake. Now, the video simply had the wires wrap around one end of the stake, and get taped in place, but Sherman was concerned about oxidation, and wanted to do it properly, so started by taking the other end of the wire dangling outside the window, stripping off the last inch of insulation, and tinning the wire with solder.
With a buildup of solder on the stake, he could then attach the tinned wire to the end of the stake. (If it’s cool outside, however, it might help to torch the end of the stake to warm it up).
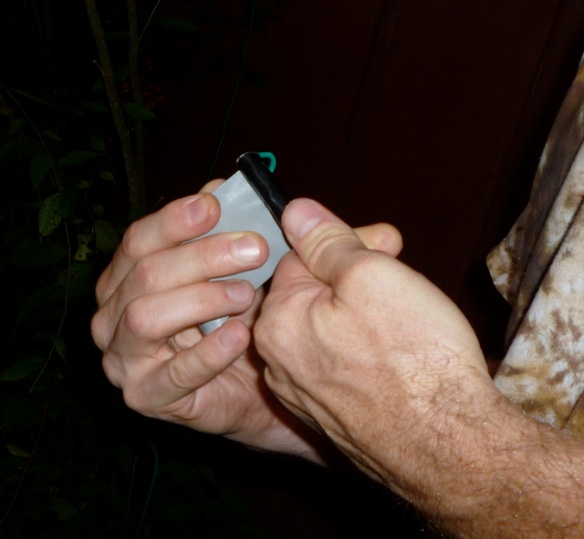
After the stake and attached wire cooled completely (it will be HOT!), he then wrapped it well with the Gorilla tape (which you’d do whether or not you’d soldered it in place, to protect it).
And he drove it into the ground all the way to the tape with a mallet (it went in VERY easily).
The first night, I didn’t notice much improvement in my sleep (and have had CRAZY dreams, but maybe that’s the next full moon coming up), and from just ONE NIGHT, I noticed some definite crinkles in the wire mesh, from me tossing & turning (it does tend to make the bed a little firmer).
But now, 3 days (nights) later as I write this, I have noticed being able to wake up easier, though I’m still somewhat tired during the day. I’m not dragging as much in the morning. But, already we’ve had to re-tape some of the top, since my weight has pulled it loose from the tape and metal ends started sticking out. Still, as an experiment, I think it’s successful! Though, I’m feeling a bit guilty over all the fuss Sherman went through to make the stake, because now I’m considering getting one of the fancy grounding sheets, as it would probably be more comfortable. But until finances are a little more stable, this will fit the bill.


